ContentfulとexpressとNuxt.jsで簡単なブログを作ってみる
Contentfulというサービスを知る機会があったので、それを用いてブログを作ってみました。 Contentfulは、ユーザー向けのページを提供しないCMS(ヘッドレスCMS)というもので、コンテンツの追加・編集画面やデータベース、そしてそのコンテンツを利用するためのAPIなどを提供しています。ベルリンの会社で、Lyftとかも顧客にいるみたいです。
今回は
- コンテンツの追加・管理 -> Contentful
- Contentfulからデータを取得して整形 -> express
- ユーザー向けの画面を生成 -> Nuxt.js といった形で簡単なブログを作ってみたいと思います。
コードはこちらで公開しています。
Contentful
まずはContentful周りの作業をします。
アカウントの作成
以下のページからContentfulのアカウントを作成できます。 少し使うだけなら無料です。
Spaceの作成
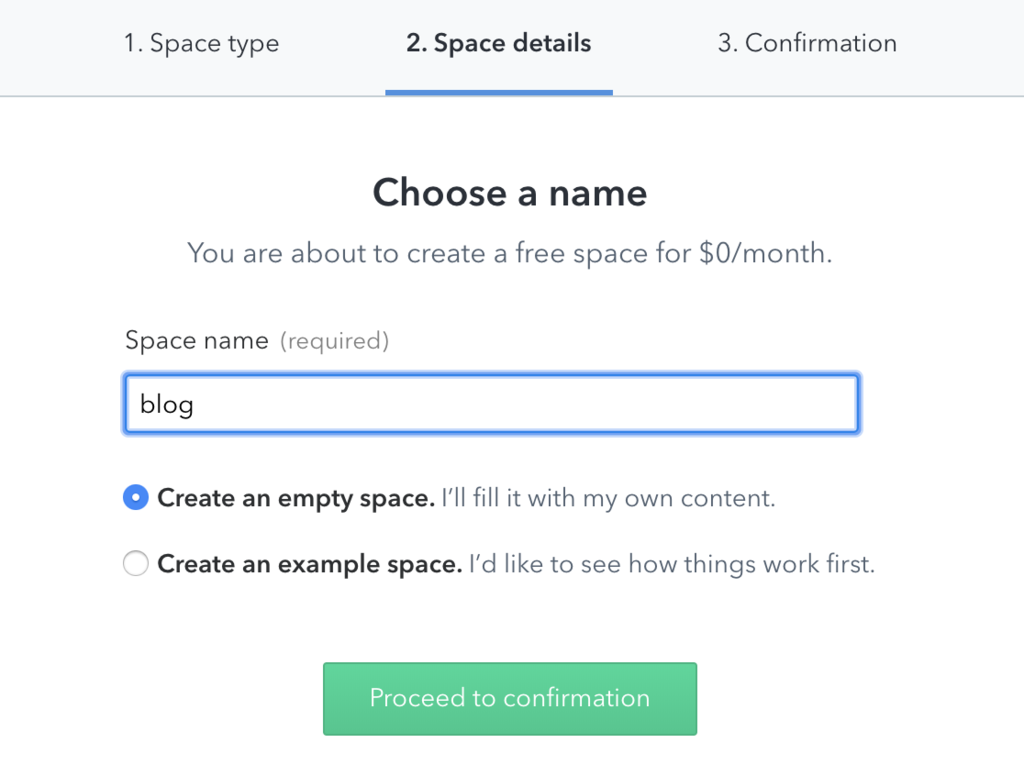
その後、Spaceというものを作ります。データベースの名前みたいなものです。今回は blogという名前の物を作ります。

Content Modelの作成
次に、Content Modelというものを作ります。データベースで言うテーブルのようなものです。
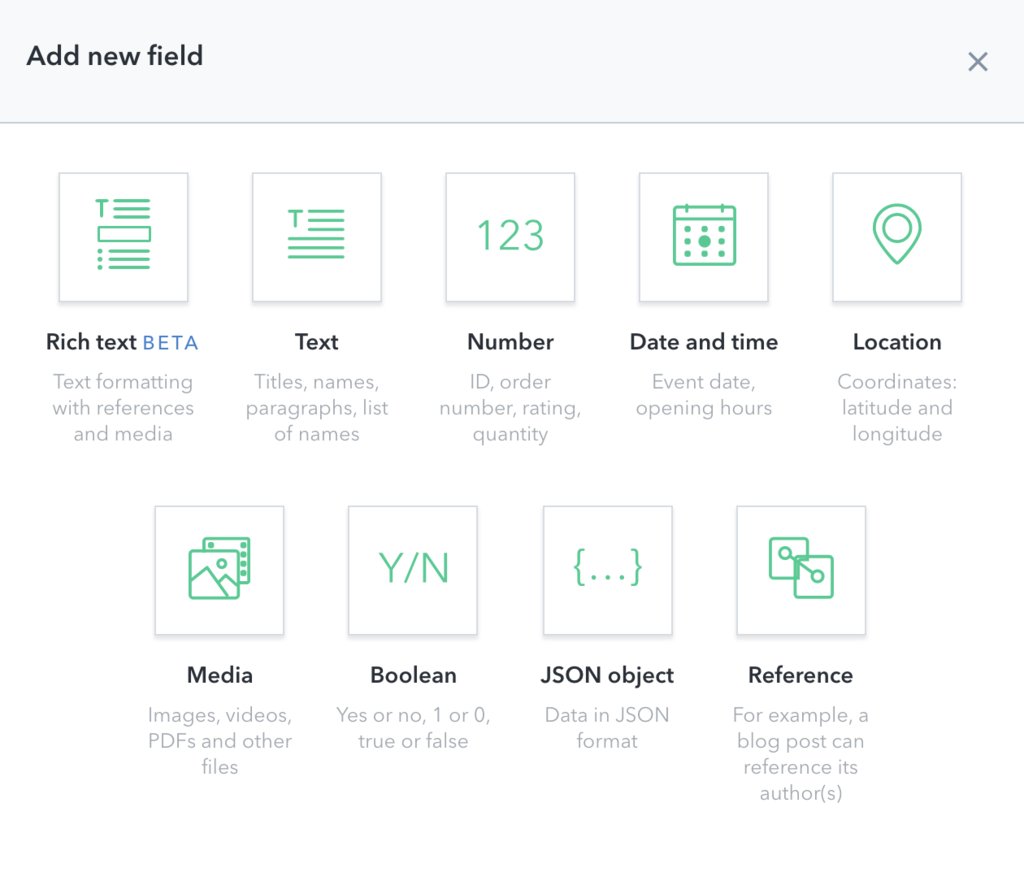
Content Modelでは、複数のFieldを定義していきます。種類は以下のようなものがあります。

今回はこのようにフィールドを定義していきました。
- 記事ID ... Short text
- タイトル ... Short text
- 日付 ... Date & time
- 本文 ... Rich text
Contentの作成
Content Modelの定義が終わったら、それに従ってContentを作成していきます。
編集画面はこのようになっています。シンプルでとても使いやすいです。

express
次に、「Contentfulからデータを取得し、整形してレスポンスとして返す」APIをexpressで作成します。
ファイル構成
- package.json
- config.js 設定ファイル
- contentful.js Contentfulのライブラリのラッパー
- index.js ルーティングの設定・処理の定義
- models.js 記事クラス(Post)の定義
package.json
{
  "scripts": {
    "start": "node index.js"
  },
  "dependencies": {
    "contentful": "^7.0.5",
    "cors": "^2.8.5",
    "express": "^4.16.4"
  }
}
config.js
こちらに必要な値はContentfulで取得できます。
module.exports = {
  CONTENTFUL_SPACE: '...',
  CONTENTFUL_ACCESS_TOKEN: '...',
}
contentful.js
const contentful = require('contentful');

const {
  CONTENTFUL_SPACE,
  CONTENTFUL_ACCESS_TOKEN,
} = require('./config');

const client = contentful.createClient({
  space: CONTENTFUL_SPACE,
  accessToken: CONTENTFUL_ACCESS_TOKEN,
});

module.exports = client;
models.js
Rich text形式のデータをHTMLに変換するためのコードも含んでいます。
Rich text形式のデータについてはこちらを参照してください。
const contentful = require('./contentful');

class Post {
  constructor({
    id,
    title,
    date,
    content,
  }) {
    this.id = id;
    this.title = title;
    this.date = date;
    this.content = content;
  }

  get contentHtml() {
    return Post.getHtml(this.content);
  }

  static getHtml(content) {
    if (content.nodeType === 'text') {
      const bold = content.marks.filter(i => i.type === 'bold').length > 0;
      const italic = content.marks.filter(i => i.type === 'italic').length > 0;
      const underline = content.marks.filter(i => i.type === 'underline').length > 0;

      const styles = {};

      if (bold) {
        styles['font-weight'] = 'bold';
      }

      if (italic) {
        styles['font-style'] = 'italic';
      }

      if (underline) {
        styles['text-decoration'] = 'underline';
      }

      if (Object.keys(styles).length) {
        return `<span style="${Object.entries(styles).map(i => `${i[0]}:${i[1]};`).join('')}">${content.value}</span>`;
      } else {
        return content.value;
      }
    }

    if (content.nodeType === 'hr') {
      return '<hr/>';
    }

    let tag = '';
    const attributes = {};

    if (content.nodeType === 'heading-1') {
      tag = 'h1';
    } else if (content.nodeType === 'heading-2') {
      tag = 'h2';
    } else if (content.nodeType === 'heading-3') {
      tag = 'h3';
    } else if (content.nodeType === 'heading-4') {
      tag = 'h4';
    } else if (content.nodeType === 'heading-5') {
      tag = 'h5';
    } else if (content.nodeType === 'heading-6') {
      tag = 'h6';
    } else if (content.nodeType === 'paragraph') {
      tag = 'p';
    } else if (content.nodeType === 'document') {
      tag = 'div';
    } else if (content.nodeType === 'unordered-list') {
      tag = 'ul';
    } else if (content.nodeType === 'ordered-list') {
      tag = 'ol';
    } else if (content.nodeType === 'list-item') {
      tag = 'li';
    } else if (content.nodeType === 'blockquote') {
      tag = 'blockquote';
    } else if (content.nodeType === 'hyperlink') {
      tag = 'a';
      attributes.href = content.data.uri;
    } else if (content.nodeType === 'embedded-asset-block') {
      tag = 'img';
      attributes.src = content.data.target.fields.file.url;
      attributes.alt = content.data.target.fields.title;
    }

    return `<${tag}${Object.entries(attributes).map(i => ` ${i[0]}="${i[1]}"`).join('')}>${content.content.map(Post.getHtml).join('')}</${tag}>`;
  }

  static async findById(id) {
    return contentful.getEntries({
      'fields.id': id,
      'content_type': 'post',
    })
      .then(i => i.items)
      .then((entries) => {
        if (!entries.length) {
          return null;
        }

        return new Post(entries[0].fields);
      });
  }

  static async list(params) {
    return contentful.getEntries(params)
      .then(i => i.items)
      .then(entries => entries.map(entry => new Post(entry.fields)));
  }
};

module.exports = {
  Post,
};
index.js
- /posts で記事の一覧を取得
- /posts/<記事id> で記事のデータを取得
といったようにしています。
const express = require('express');
const cors = require('cors');

const { Post } = require('./models');

const app = express();

app.use(cors());

app.get('/posts', async (req, res) => {
  const posts = await Post.list(req.query)
    .then(posts => posts.map(post => ({
      id: post.id,
      title: post.title,
      date: post.date,
    })));

  res.send(posts);
});

app.get('/posts/:id', async (req, res) => {
  const post = await Post.findById(req.params.id);

  // 投稿が存在しない場合には404エラー
  if (!post) {
    res.status(404).send({
      error: 'not found',
    });

    return;
  }

  res.send({
    id: post.id,
    title: post.title,
    date: post.date,
    content: post.contentHtml,
  });
});

app.listen(4000);
動かしてみる
以上のディレクトリで npm start を実行すると、サーバーが localhost:4000 で立ち上がります。
http://localhost:4000/posts で投稿のリストを取得します。以下のようなレスポンスが返ってきます。
[{"id":"what-is-contentful","title":"Contentfulを試してみた","date":"2018-12-01T00:00+09:00"}]
http://localhost:4000/posts/what-is-contentful で投稿の詳細を取得します。以下のようなレスポンスが返ってきます。
{"id":"what-is-contentful","title":"Contentfulを試してみた","date":"2018-12-01T00:00+09:00","content":"<div><h1>Contentfulとは</h1><p><a href=\"https://www.contentful.com/\">Contentful</a>は<span style=\"font-weight:bold;\">ヘッドレスCMS</span>です。</p><p>以下のように画像を挿入したりもできます。</p><img src=\"//images.ctfassets.net/gu6l9tv1vpsd/2kMHqVs6JS6wMkOqOWIGMU/fe98c0c3a6f207a4d9286171e348bd6b/____________________________2018-12-10_1.50.46.png\" alt=\"スクリーンショット 2018-12-10 1.50.46\"></img><p></p><p></p><p></p><p></p></div>"}
Nuxt.js
次に、expressからデータを取得して表示するページをNuxtで作成します。
フィアル構成
- layouts/default.vue
- pages/index.vue
- pages/posts/_id.vue
- nuxt.config.js
- package.json
package.json
{
  "scripts": {
    "start": "nuxt"
  },
  "dependencies": {
    "@nuxtjs/axios": "^5.3.6",
    "nuxt": "^2.3.4"
  }
}
nuxt.config.js
Nuxtの設定ファイルです。axiosモジュールを使うようにしています。
module.exports = {
  modules: [ '@nuxtjs/axios' ],
};
layouts/default.vue
デフォルトのレイアウトを定義します。
<template>
  <div class="page">
    <section class="header">
      <nuxt-link to="/">
        <h1>Contentful + Express + Nuxt で作るブログ</h1>
      </nuxt-link>
    </section>
    <section class="main">
      <nuxt/>
    </section>
  </div>
</template>

<style scoped>
.page {
  max-width: 720px;
  margin: 0 auto;
  padding: 20px;
}

.header {
  padding: 20px 0;
}

.header a {
  text-decoration: none;
}

.header h1 {
  font-size: 18px;
  /* text-align: center; */
}

.main {

}
</style>

<style>
* {
  box-sizing: border-box;
  margin: 0;
  color: #333;
}
</style>
pages/index.vue
トップページ(記事の一覧ページ)です。今回は簡単のためにコンポーネント化などはしません。
<template>
  <div>
    <ul class="post-list">
      <template v-for="(post, idx) in postList">
        <li :key="'post'+idx">
          <nuxt-link :to="'/posts/' + post.id">
            <span v-text="post.title"/>
          </nuxt-link>
        </li>
      </template>
    </ul>
  </div>
</template>

<script>
export default {
  async asyncData({ app }) {
    const postList = await app.$axios.get('http://localhost:4000/posts')
      .then(i => i.data);

    return {
      postList,
    };
  },
}
</script>

<style scoped>
.post-list {
  margin: 0;
  padding: 0;
}

.post-list li {
  list-style: none;
}
</style>
pages/posts/_id.vue
記事の詳細ページです。存在しない記事を見ようとした場合には404エラーになるようにしています。
<template>
  <div>
    <p
      v-text="formatDate(post.date)"
      class="post-date"/>
    <h1
      v-text="post.title"
      class="post-title"/>
    <div
      v-html="post.content"
      class="post-content"/>
  </div>
</template>

<script>
export default {
  async asyncData({ app, params, error }) {
    const post = await app.$axios.get(`http://localhost:4000/posts/${params.id}`)
      .then(i => i.data)
      .catch(() => null);

    if (!post) {
      return error({
        statusCode: 404,
      });
    }

    return {
      post,
    };
  },
  methods: {
    formatDate(date) {
      return date.split('T')[0].split('-').map(Number).join('/');
    },
  },
};
</script>

<style scoped>
.post-date {
  font-size: 12px;
}

.post-title {
  font-size: 24px;
}

.post-content {
  padding: 20px 0;
}
</style>

<style>
.post-content h1 {
  font-size: 20px;
  margin: 5px 0;
}

.post-content h2 {
  font-size: 20px;
  margin: 5px 0;
}

.post-content h3 {
  font-size: 18px;
  margin: 5px 0;
}

.post-content h4 {
  font-size: 18px;
  margin: 5px 0;
}

.post-content h5 {
  font-size: 16px;
  margin: 5px 0;
}

.post-content h6 {
  font-size: 14px;
  margin: 5px 0;
}

.post-content p {
  font-size: 14px;
  margin: 5px 0;
}

.post-content img {
  max-width: 100%;
  margin: 5px 0;
}
</style>
動かしてみる
APIを起動させたまま、このディレクトリで npm start を実行すると localhost:3000 でサーバーが立ち上がります。
以下のように、記事の一覧ページ、記事の詳細ページを表示することができます。


Contentful、相当使いやすいですね。疑問点などあったらコメントなどでご質問ください。